Zapier Integration Tutorial
In this small tutorial, we will set up a Zap that will monitor a Google Drive folder. If a file is added to that folder, it will be filed into the proper quarterly folder.
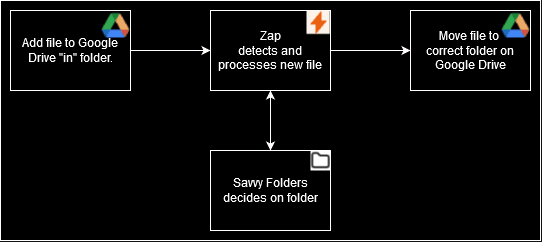
By the end of this tutorial, you will be able to copy a file into your Google Drive's in folder and have it automatically filed in the correct quarterly folder. For instance, when I write this, it is Q4 of 2024, so the file would be automatically moved from the input folder into the 2024/Q4 folder.
The Zap that we are going to create looks as follows:
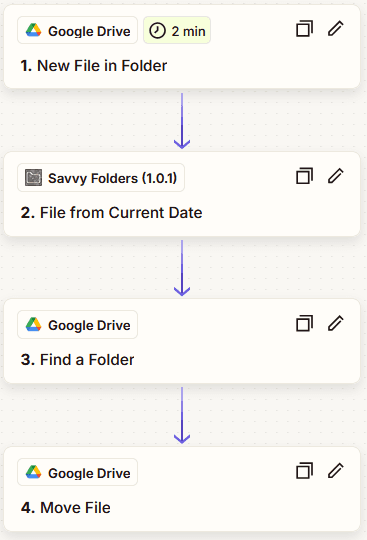
Every two minutes, Zapier will check if there is a new file in the input folder. If there is, it will use Savvy Folders to determine the correct folder to move the file to. It will find that folder in Google Drive and move the file there.
To complete this tutorial, you will need a Savvy Folders account. This tutorial uses only the free features, so it will cost you nothing. No need to enter credit card details.
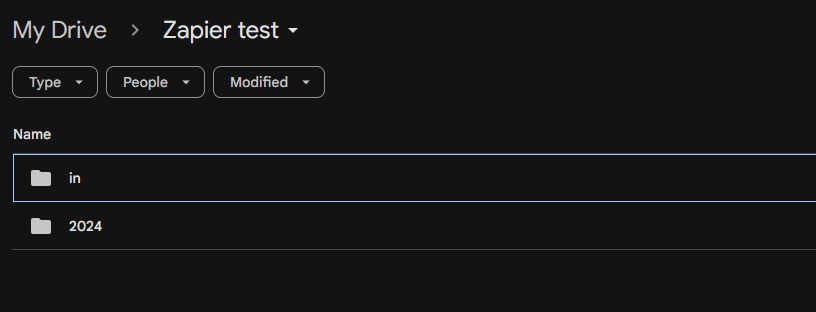
In your Google Drive, create a folder for this tutorial. I called mine Zapier test but you can name it anything you like.
Create an in input folder and a folder for the current year.
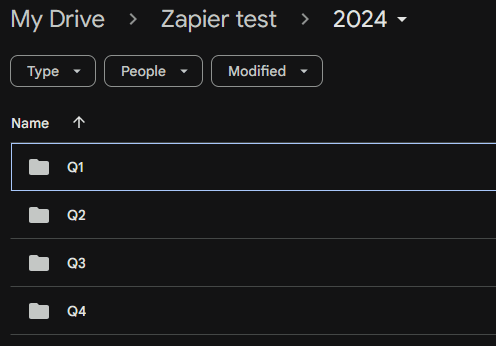
Inside the year folder, create four folders for each quarter: Q1, Q2, Q3, and Q4.
Finally, put a test file inside the in folder. You can use any file, but here is one if you are out of inspiration.
Below, you will find a detailed description of how to manually create the Zap. However, if you want to skip straight to the good stuff, you can simply use this Zapier template:
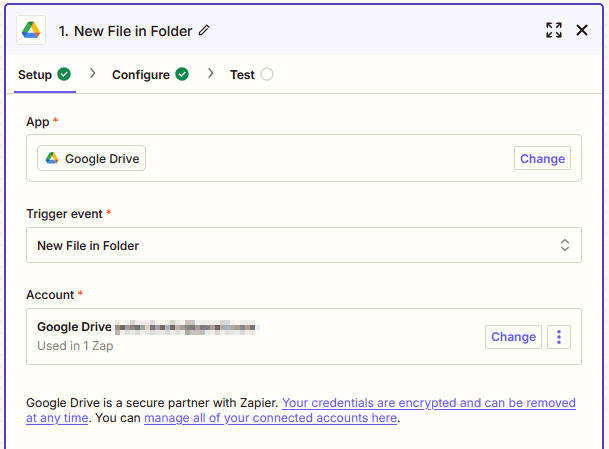
Go to Zapier and create a new Zap. Choose Google Drive as the trigger app. In the setup step, choose "New File in Folder" and connect your account if you haven't done this already.
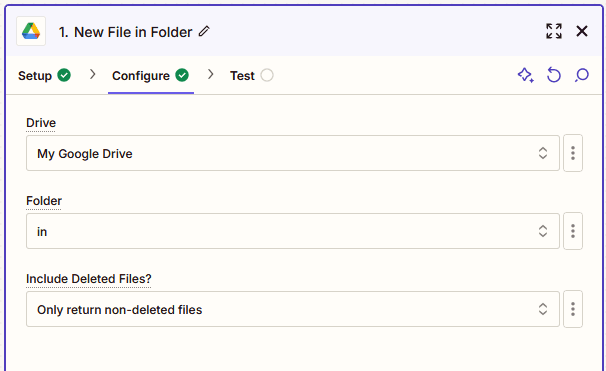
In the configure step, choose your drive and the in folder that we created earlier.
Test the trigger with the test file. The file that you added in the first step should show up. Click on it to inspect the details and finally click on "Continue with selected record".
Now add a Savvy Folders step. Choose "File from Current Date". This Savvy Folders option is free to use. It does not inspect your document but simply uses the current date to determine the folder to file the document in. Read up on Smart filing right here.
Add the step and click Sign in to your account. A popup will show up asking for your API key. Your API key is:
Sign up to get an API key
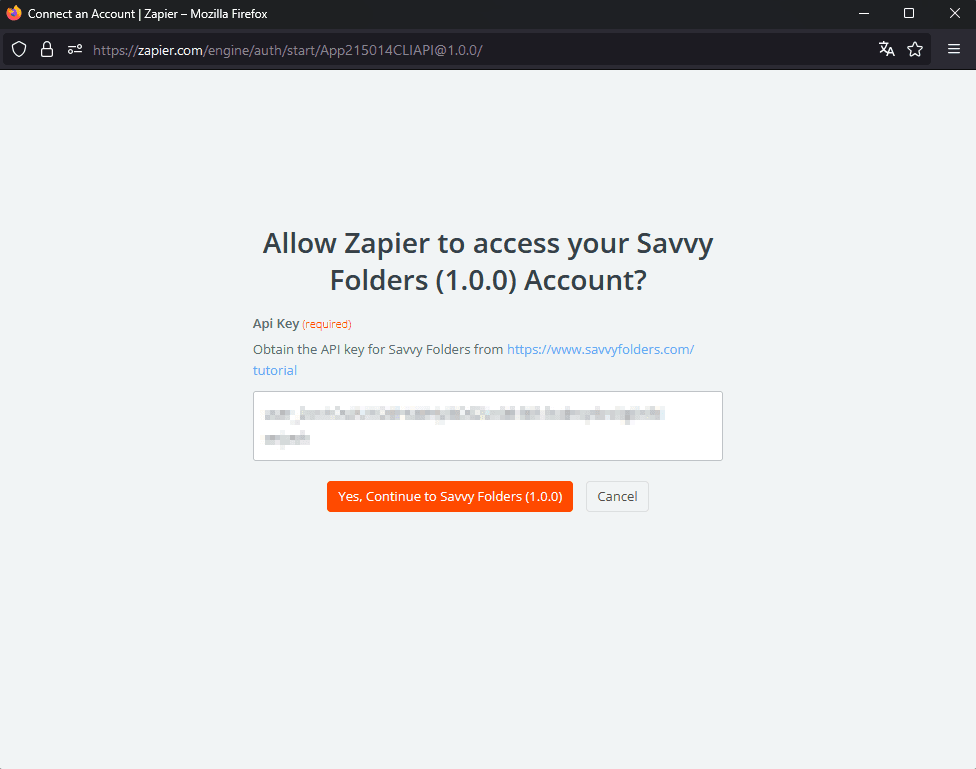
Your Savvy Folders account will show up with your e-mail address.
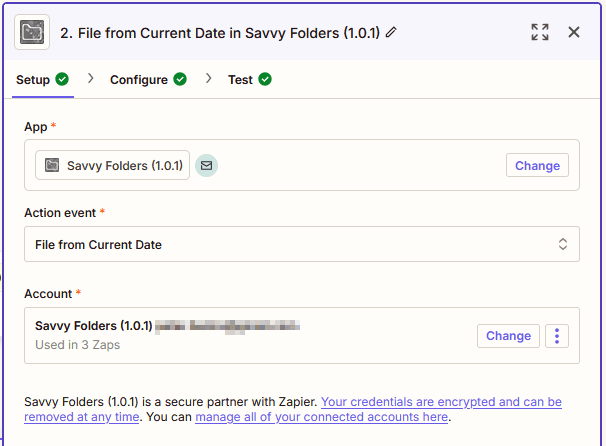
In the configure step, you can use the base folder field blank, or enter anything. We will not use it in this tutorial.
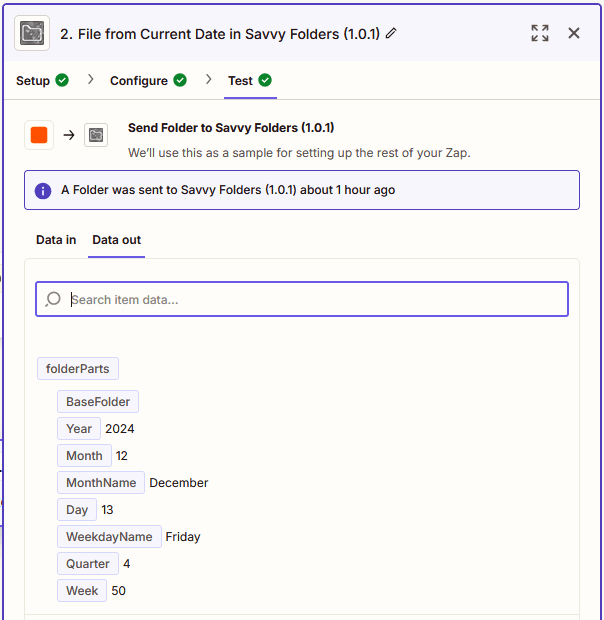
Finally, test the step, you should see the current quarter in the output, along with other data you can use to file the document.
Important: Do not share this key with anyone. This key gives full access to your account.
Before we can store the file, we need to find the ID of the Google driver folder. For that, we will add another Google Drive step. Choose the Find folder action and your Google Drive account.
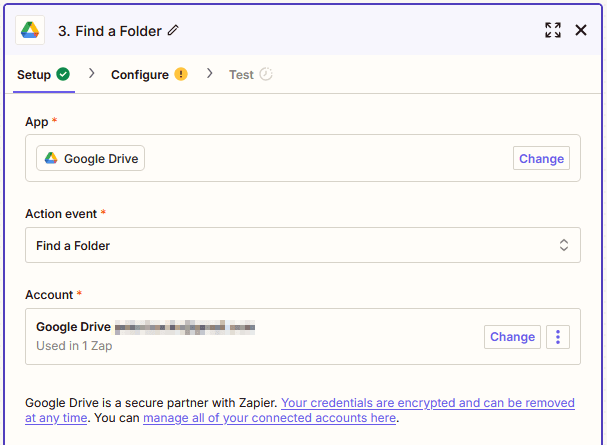
A note on finding the right folder: For this tutorial, we will simply search the quarter folder by using the number returned by Savvy Folders. As an example, Savvy Folders will return quarter 4, while the folder name if Q4. This will work find for this case because we only have the 4 quarterly folders. In some cases this may not work correctly, you may need to add the Q letter explicitly or use more complicated operations with a Formatter step to construct the correct folder name. You may also want to extend the Zap with things like creating the folder if not found.
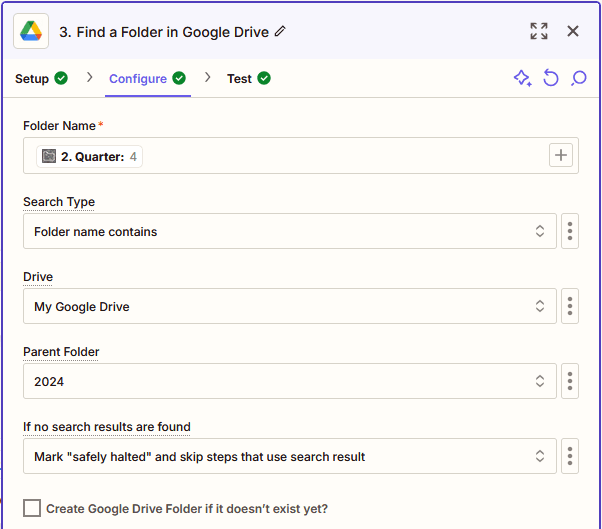
For this tutorial, we will set the configuration as follows:
- In the Folder Name field, type a slash. This will bring up a small browser. Click on the previous step "File from Current Date" and select the "Quarter" field. This field should be filled with the number from testing the previous step.
- Choose a search type of "Folder name contains".
- For Drive choose your Google Drive.
- For Parent Folder, pick the year folder that we created in the very first step.
- Keep the "safely halted" option if the folder is not found.
If everything went right, the configuration should look like this:
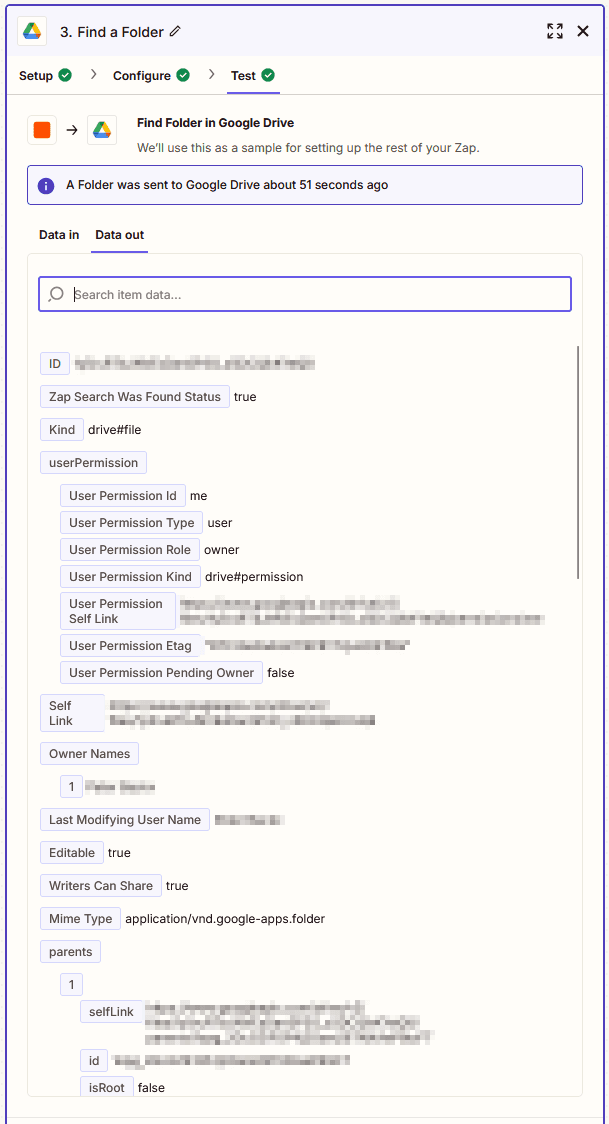
After testing the step, you should see "Zap Search Was Found Status" to be true. And if you scroll down the "Title" field should show the folder name (currently, Q4).
Now add the final step, a final Google Drive step. Choose the Move file action and your Google Drive account.
In the configure step, we are going to bring all information together that we have collected in the previous steps.
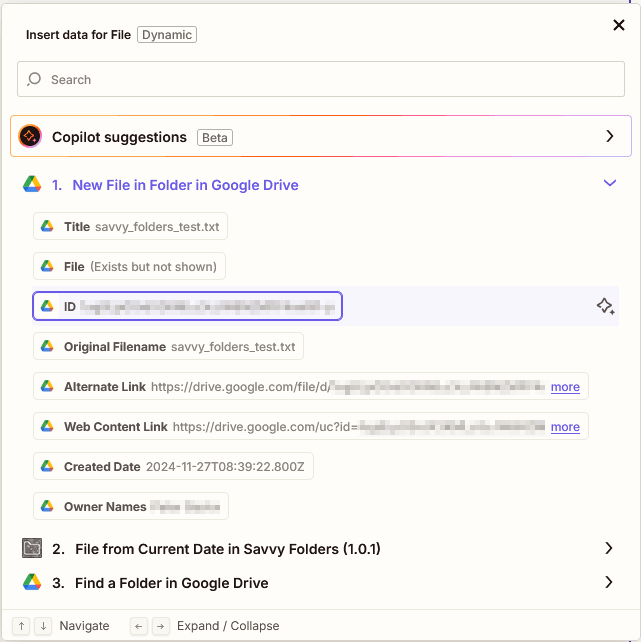
For File, click on the 3 dots to choose a custom value. In the popup, select the first step and from that, select "ID". Note that you may be tempted to select "File", but this will not work for moving files on Google Drive.
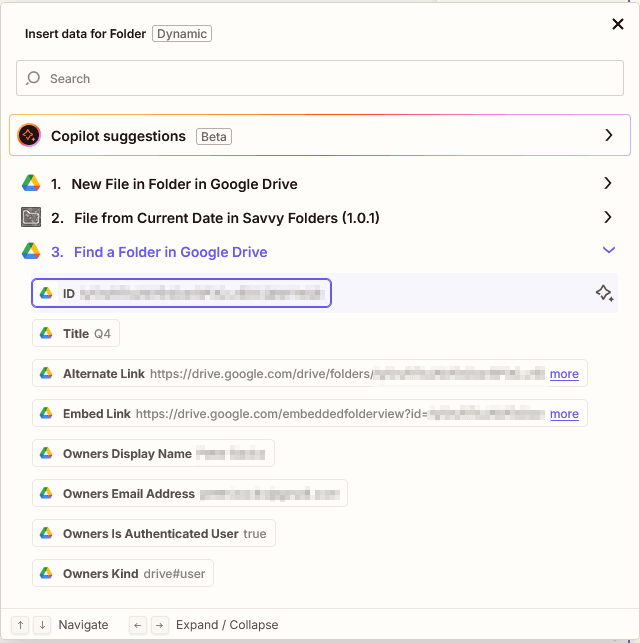
For the folder, again click on the 3 dots to choose a custom value. In the popup, select the last step and from that, select "ID".
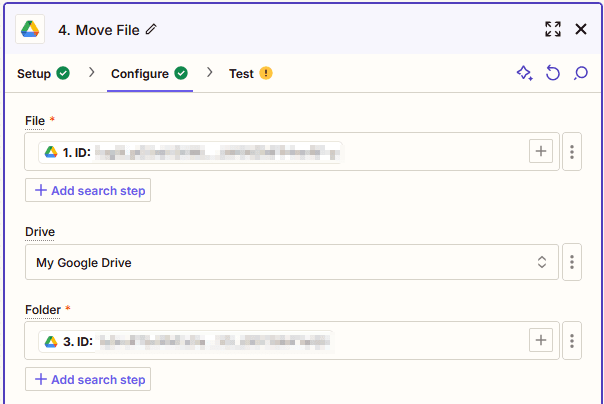
The configuration should look as follows:
Finally, test the step. Check out your Google drive folder and you should see that the file was moved to the correct folder.
That's it. Click the Publish button and your Zap is live.
Once published, testing is easy: just add a file to the input folder and check if it shows up in the correct quarter folder. By default the Google Drive trigger will check every 2 minutes, so it can take up to 2 minutes for the file to show up in the correct folder. You can tweak this in the advanced Zap settings.
Note that files with the same file name will also be moved. Google Drive supports having files with the same file name. This may get confusing, so depending on your use case, you may want to add additional steps in the Zap to prevent this from happening.
If you want to adapt this Zap and anything does go wrong, know that you can inspect every run in the Zapier dashboard. Click on the clock labeled Zap runs on the left of the Zap editor.
